
このサイトはWindowsマシンで作成しています。作成したHTMLをWebServerへ媒体(USBメモリー)でコピーするのも大変なのでLANを使ってコピーできればと思いFTPServerソフトをインストールすることを決めた。Vineに用意されていたProFTPDを使用することにした。Windowsマシンから、FFFTPでWebServerにコピーしている。
ProFTPDの入手
インストールはアップグレードの方法でSynapticから行います。コマンドからもできますが、Windowsに慣れている方はSynapticをお勧めします。
バージョンは、1.2.10です。また、下記URLからProFTPDの詳細がわかります。
Linuxの場合は、各デストリビューション(Vineもその中のひとつ)で用意しているので、そのバージョンを使用します。
インストール方法は、ApacheやPHPと同じ方法で行います。
ProFTPDのインストール
 Synapticを立ち上げ、検索でproftpdを検索します。
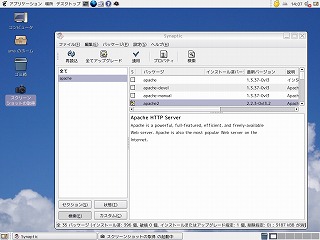 proftpdをクリックすると窓が出てくるのでインストールをクリックします。下の画面になります。四角に黄色矢印がつきます。
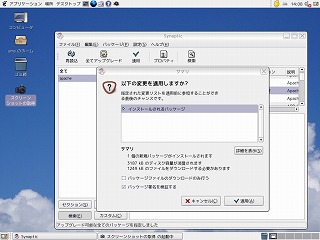 全てアップグレードをクリックし適用をクリックします。確認画面が出るので、適用をクリック。インストールを開始します。
 proftpdの四角が緑色になっていればインストール終了です。
フォルダの作成
今回は、ホームページをWindowsマシンで作成し、WebServerがLinuxマシンの環境です。作成したHTMLを直接Linuxの公開しているフォルダにアップをする設定を行います。
Apacheで設定したDocument Rootを参考にします。"/home/page/html"以下にHTMLやCSSなどのファイル・フォルダが入りますので/html以下だけが、見えるようにします。
/home/page/htmlのグループと所有者は起動時のユーザ名になっています。
このまま、設定してしまうとhome以下が見られてしまう可能性があるので/page以下の所有者を変更します。
今回は、所有者を"umacame":パスワードを"life"の設定で行います。
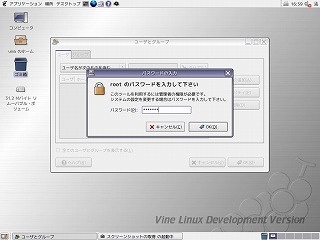 ユーザ(所有者)を作成します。ツールバー上の[ディスクトップ]→[システム管理]→[ユーザーとグループ]をクリックします。パスワードを聞いてくるのでRootのパスワードを入力、Enter。
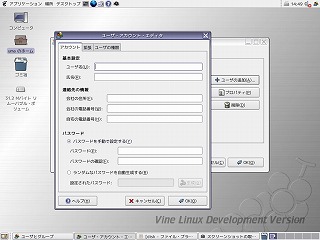 作成画面が出るので、umacameを追加するため[ユーザーの追加]をクリック。以下の画面が出るので、ユーザー名をumacame、パスワードをlifeで入力して[OK]をクリック。
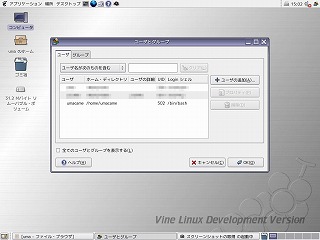 追加されていることを確認します。
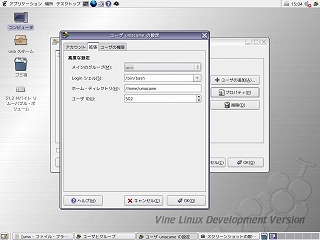 次に、グループをログインしているグループと同じにします。umacameのフォルダを/pageにします。umacameをプロパティで開きます。次に拡張タブをクリックし、グループを今ログインしているグループを選択し、ホーム・ディレクトリを/home/pageに書き換えます。[OK][OK]で準備完了です。
今までの操作はユーザーを作成しただけなので、次に/pageの所有者を変更します。これは、コマンド操作で行います。GNOME端末を起動し、suでroot権限に入ります。以下の通り入力し、lsで確認します。
これで/page以下のファイルと所有者はumacameになっているはずです。
次にファイルシステム/pageフォルダーのプロパティで確認します。アクセス権タブを開き所有者がumacameになっていればOKです。
初期設定
フォルダが作成できたら、ProFTPDnoの設定を行います。変更ファイルは、etc/proftpd.confです。
GNOME端末を起動してsuでroot権限に入ります。
と入力しEnter。
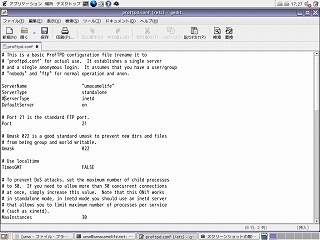 左の画面が出たら、変更を加えます。
# 'proftpd.conf' for actual use. It establishes a single server
# and a single anonymous login. It assumes that you have a user/group
# "nobody" and "ftp" for normal operation and anon.
ServerName "umacamelife" ←名前の変更は何でも良い。
ServerType standalone ←inetdの方法もあるが設定が大変なのでこのまま。
DefaultServer on
# Port 21 is the standard FTP port. Port 21
# Umask 022 is a good standard umask to prevent new dirs and files
# from being group and world writable.
Umask 022
# Use localtime
TimesGMT FALSE
# To prevent DoS attacks, set the maximum number of child processes
# to 30. If you need to allow more than 30 concurrent connections
# at once, simply increase this value. Note that this ONLY works
# in standalone mode, in inetd mode you should use an inetd server
# that allows you to limit maximum number of processes per service
# (such as xinetd).
MaxInstances 30
# Set the user and group under which the server will run.
User nobody
Group nobody ←nogroupから変更
# iconv patch: set local/remote encoding
# http://www.hakusan.tsg.ne.jp/tjkawa/software/misc/proftpd-iconv/index.jsp
# CharsetLocal EUC-JP-MS
# CharsetRemote CP932
# CharsetRemote EUC-JP-MS
# Normally, we want files to be overwriteable.
<Directory ⁄>
AllowOverwrite on
</Directory>
# A basic anonymous configuration, no upload directories.
# <Anonymous ~ftp> ←ここから#でコメントアウト
# User ftp
# Group ftp
# We want clients to be able to login with "anonymous" as well as "ftp"
# UserAlias anonymous ftp
# Limit the maximum number of anonymous logins
# MaxClients 10
# do not require shells listed in /etc/shells (user ftp do not have
# shell...)
# RequireValidShell no
# We want 'welcome.msg' displayed at login, and '.message' displayed
# in each newly chdired directory.
# DisplayLogin welcome.msg
# DisplayFirstChdir .message
# Limit WRITE everywhere in the anonymous chroot
# <Limit WRITE>
# DenyAll
# </Limit>
# </Anonymous> ←ここまで#でコメントアウト
<Limit LOGIN> ←ここから追加
Order allow,deny
Allow from 192.168.0.0/24
Allow from 127.0.0.1
Deny from all
</Limit>
ServerIdent on "ftp server"
UseReverseDNS off
IdentLookups off
DefaultRoot ~/html ←ここまで追加
↑ここで、ftpで入れるフォルダを指定。この場合は、html以下しかファイル操作することができない。
変更が終了したら、保存してgeditを終了。
起動
起動方法は、サービスの管理から行えます。Apache2の起動を参考にしてください。FTP サーバーにチェックを入れれば完了です。再起動後、有効になります。また、コマンドからも行えるので参考にしてください。
proftpdの起動と再起動のコマンドは以下の通りです。必ず、rootで行ってください。
# /etc/rc.d/init.d/proftpd startと入力してenterキー。
# /etc/rc.d/init.d/proftpd restartと入力してenterキー。